Issues
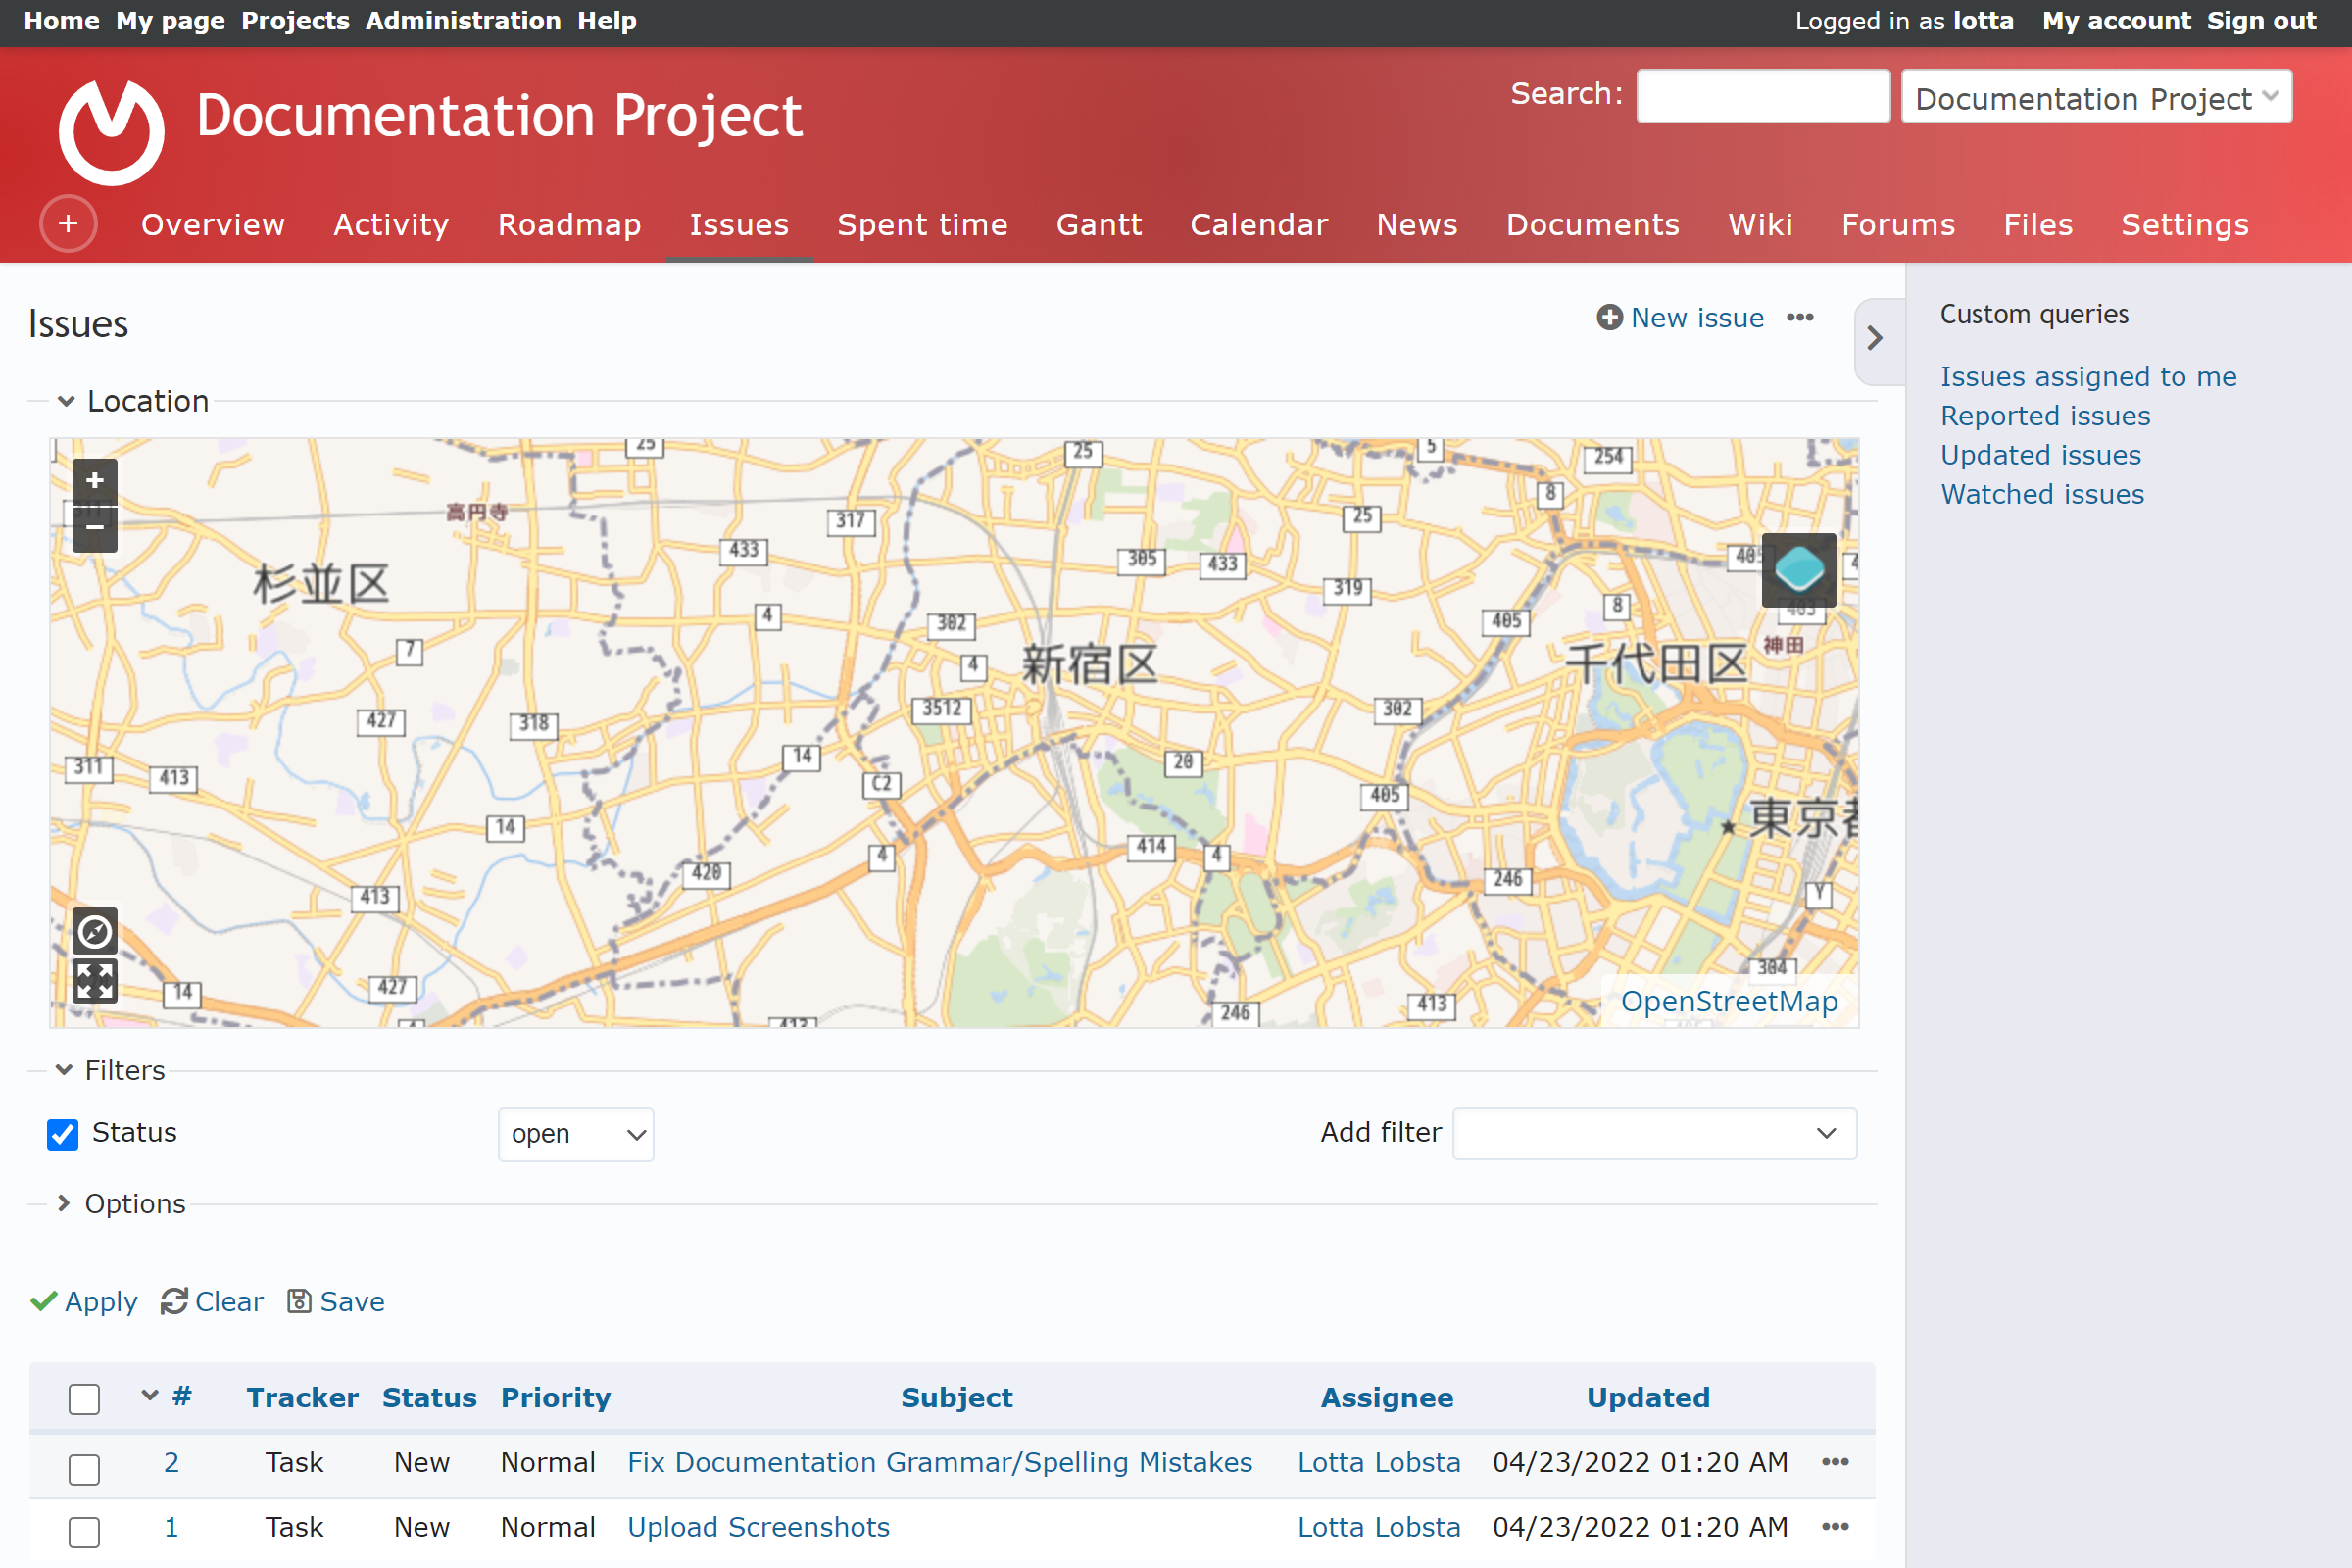
Issues lie at the core of projects, allowing the user to create tasks concerning the project. Issue completion is measured in time(hrs), which is the work a user does on an issue. Issues can be assigned to a member and can be referenced with geolocation information . On the side bar you can configure custom queries.

Location
Location displays all geolocation information registered from the issues of the project. The map can zoom in or zoom out. Clicking on the respective icon or line will display the issue title with an edit prompt, which will redirect to editing an issue.
Issue List
Issues are displayed in list form, with the following default column titles:
- #: This is the issue number of the LOBSTA environment.
- Tracker : Defines the type of Issue.
- Status : Defines the completion status of the Issue.
- Priority : Defines the priority of the Issue.
- Subject : The title of the Issue.
- Assignee: Shows which member is assigned to that issue.
- Updated : Shows last date the Issue was Modified.
An issue can be opened or closed. An open issue is an issue being worked on while a closed issue is a completed issue. A crossed out issue is a closed issue. This category is assigned on an issue status by admin.
... Dropdown Menu
Clicking on the ... dropdown menu in the top right corner will show you:
- Summary
- Import
- Settings
New Issues
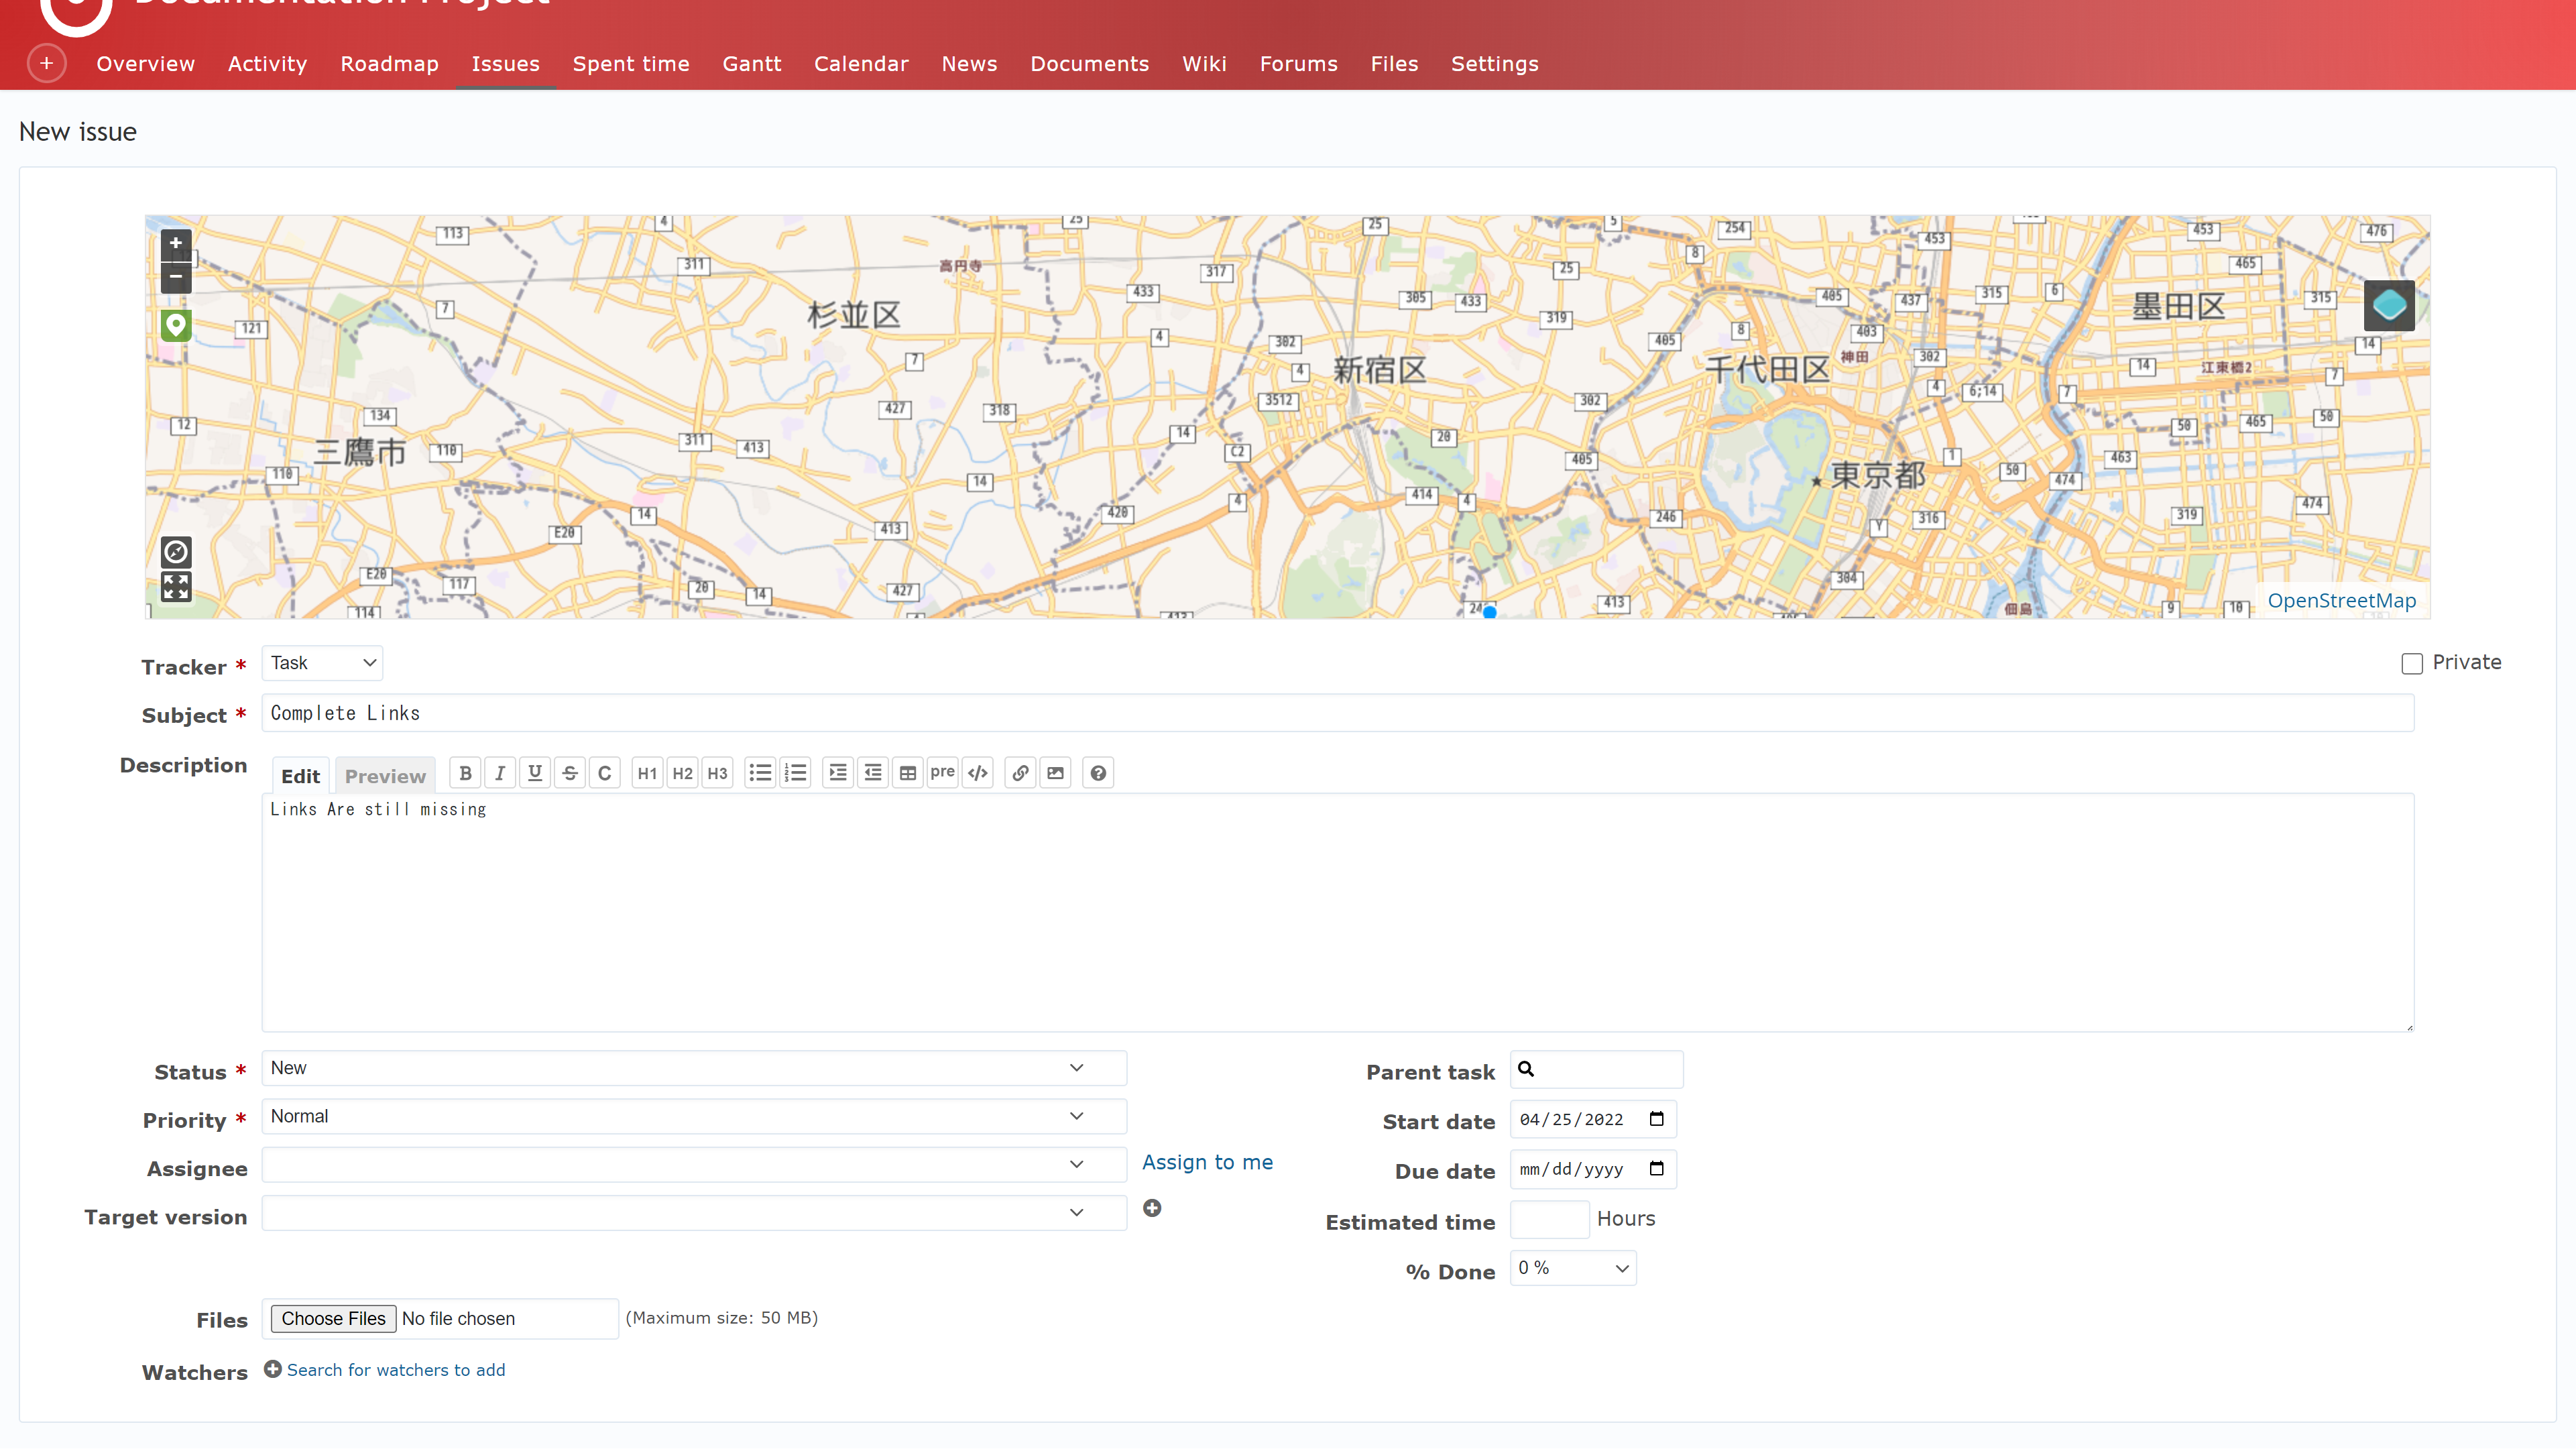
From Issues tab top right corner, or project overview's ➕ sign, a New Issue will redirect here.

Form
To make a new Issue, you must fill the following:
| Field Name | Description | Valid Input | Notes |
|---|---|---|---|
| Tracker | The type of Issue. | Dropdown. | Tracker categories are defined by an admin in global settings and then enabled in project settings. |
| Private | Makes the issue private, only members of the project can interact with this issue. | Tickable. | Ticked on by default. |
| Subject | The title or purpose of the Issue. | Text. | |
| Description | A description of the issue. | Text. | |
| Status | Completion status of the issue. It also indicates if the issue is open or closed. | Dropdown. | Status categories are defined by an admin in global settings. |
| Priority | Defines the priority of the issue. | Dropdown. | Priority categories are defined by an admin in global settings. |
| Assignee | Links the user responsible on resolving the issue. | Dropdown. | Eligible to members of the project or oneself. |
| Category | Allows assigning project sensitive categories. | Dropdown. | Issue categories are defined in project settings. |
| Target version | Can reference the issue to a target version. | Dropdown. | See roadmap for more. |
| Parent Task | Nest's the issue to a parent issue. | Number. | Must write the hashtag followed by the issue number. (ie. #3456) |
| Start/due date | Time range of desired issue completion. | Date | By default, current day is used as Start date. |
| Estimated time | The amount of work required to finish the issue, measured in hours. | Number. | |
| % Done | Estimates how completed the issue is, in percentage. | Dropdown. | By default, it is manually filled. An admin can assign % done to issue status to automatically fill this field. |
| Files | Attaches a file related to the issue. | Any file. | File size and extension is defined by admin. |
| Watchers | Assigns members or groups of the same project to supervise the issue. | Tickable options. |
Admins can personalize custom fields on the new issue form!
OpenStreetMap
LOBSTA allows you to assign issues with a geolocation reference with OpenStreetMap plugin.
You can hold left click and drag to move the map. On the left side you have the following buttons
- Zoom in : The map zooms in the viewable area
- Zoom out : The map zooms out the viewable area.
- Point : Places a point. Inner shape is changed by tracker, and color by status.

- Line: Places a line.

- Poligon: Places a polygon.

- Upload GeoJSON: Uploads a GeoJson file.
- Geolocation: Asks for your computer´s location to use as reference.
- Maximize : Sets a default view area.
How to use?
- Point
- Line
- Polygon
- Left click and hold to move the viewable area, you can do this at any time. Zoom in or out on preference.
- Select point. Should highlight green the point icon.
- Left or right click on desired location to drop a point.
- Made a mistake? You can click on another location and the first one gets erased.
- Left click and hold to move the viewable area, you can do this at any time. Zoom in or out on preference.
- Select line. Should highlight green the line icon.
- Left or right click on desired location, it will mark a point.
- Move the mouse to another location and a line will form. Double right click to mark that line on the map.
- Alternatively, on step 4, click again on the map to drop another point. The line will form and you will be allowed to continue the line. Right click marks all the lines made on the map.
- Made a mistake? Repeat from step 1, and when you double right click the previous line will be deleted.
- Left click and hold to move the viewable area, you can do this at any time. Zoom in or out on preference.
- Select polygon. Should highlight green the polygon icon.
- Left or right click on desired location to drop a point, and extend as if following the instructions of making a line.
- The area between lines will have a shade. This highlights the inner area of the polygon.
- If at least 2 polygon lines are placed, double right clicking will automatically complete the polygon. The completion of the polygon is relative to the position of your mouse the moment you double right click. You should see the polygon preview.
- If at least 2 polygon lines are placed, hover your mouse to the original point and it will align to the point. Left click or right click completes it at that moment.
- Made a mistake? Repeat from step 1, and the moment you double right click the previous polygon will be deleted.
Issue Page
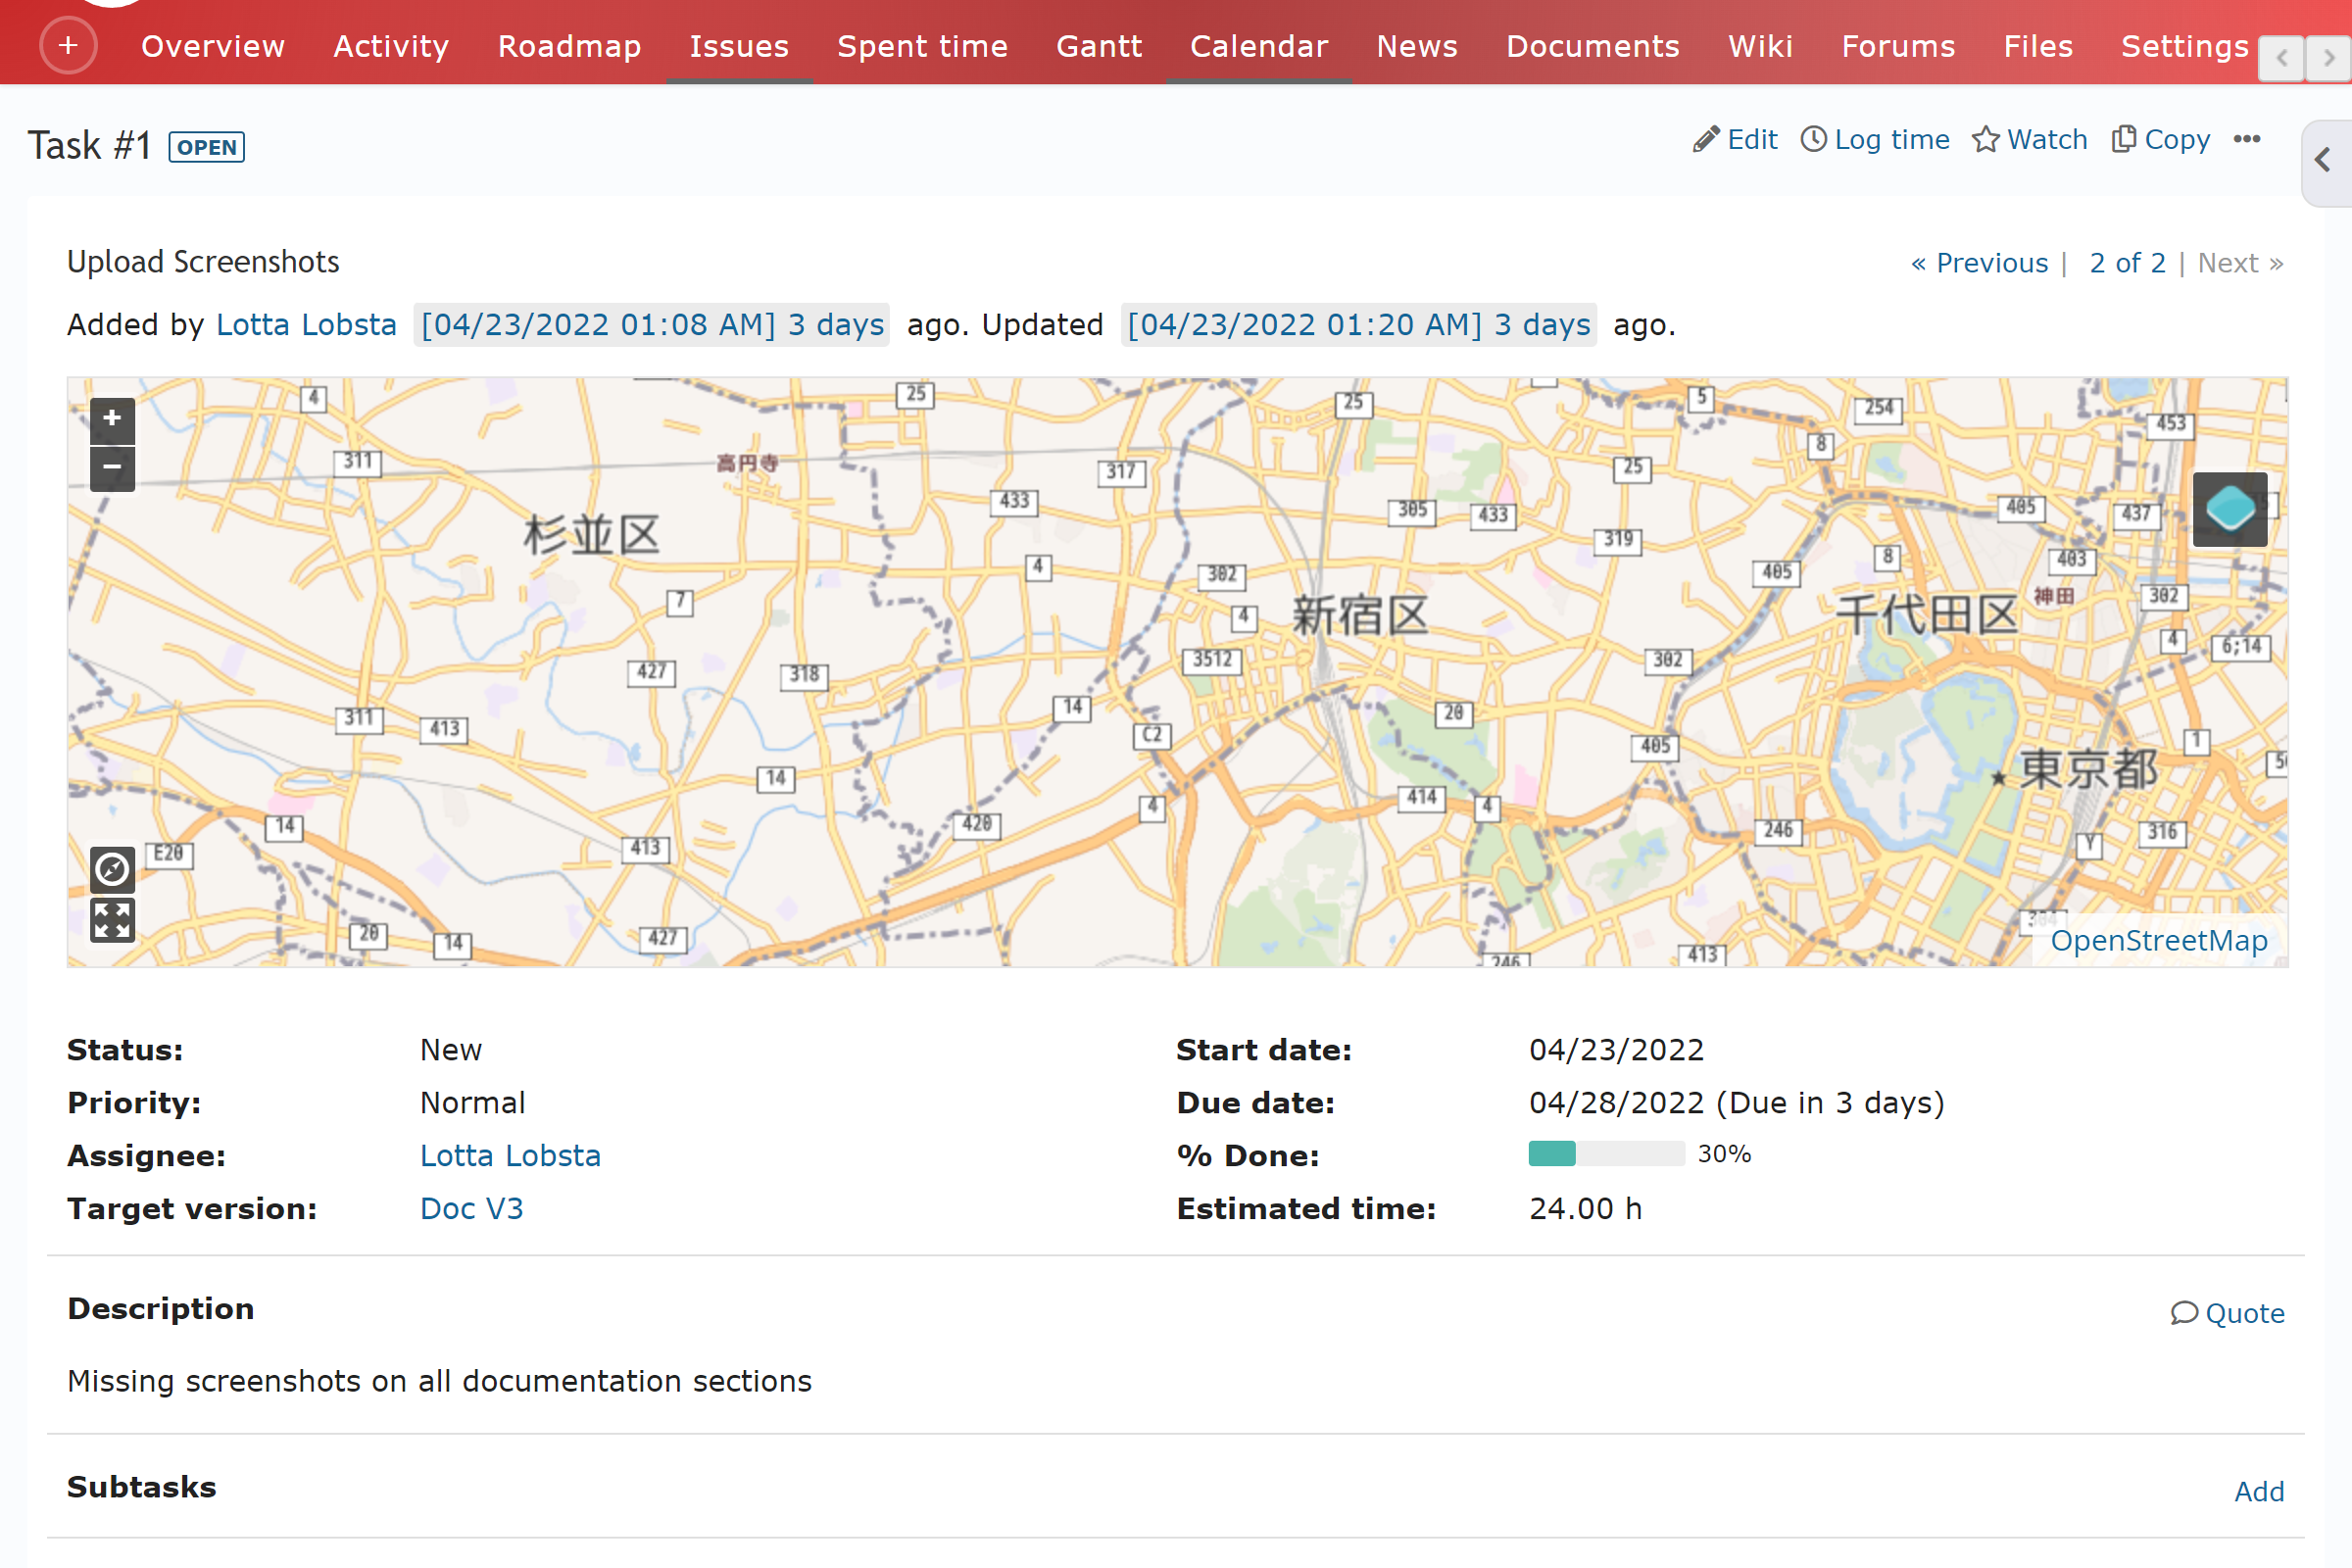
On the Issue list, clicking the issue subject will take you to the descriptive issue page. You can view the details of the issue selected. The information displayed here is identical as when filled in New Issues, but displayed differently.

Add
More options appear which you can add:
Subtasks: Creates a nested issue, and displays it here. Identical to the New Issue page, but the parent issue field will be automatically filled this way.
Related Issues: Shows the dependency of the issue with other issues, chosen from a list.
- Related to: Basic link to another issue.
- Is Duplicate of: Links issues so that if the linked one closes, so does this issue.
- Has duplicate: Links issue so that if this issue closes, the linked issue closes too.
- Blocks: Links issues so that a linked issue cannot be closed unless this issue closes first.
- Blocked by: Links issue so that this issue cannot be closed unless the linked issue closes first.
- Follows: Defines an order, where the linked issue must be completed before this issue can start.
- Precedes: Defines an order, where this issue must be completed so that the linked issue can start.
- Copied to: Identifies a copy was made from this issue to the linked issue.
- Copied from: Identifies a copy was made from linked issue to this issue.
The following appear once an issue has been edited, and appears automatically here:
- Spent Time: Logs the time registered of the updated issue
- Notes: Text regarding the issue. These notes can be edited by yourself or others (according to your roles and permissions) and can be private or public. WIP does a public note show on a private project?
- History: Logs changes of current issue.
At the top right corner, you will have:
- Edit: Allows you to edit the current issue.
- Log time: Allows you to update the time logged on the issue, redirects to Spent time with the Issue field automatically filled.
- Watch: Assigns yourself as a watcher. Can view and assign other members as watchers from add from the sidebar.
- Copy: Copies the issue. Similar to form of New Issue, but with extra toggles on by default that copies attachments and subtasks and sets Copied from relation to the copied issue and Copied to the current issue..
With the ... drop down menu:
- Copy Link
- Delete
Editing an Issue
This page shows the information filled in New Issues, but with some extra functionalities. Editing will show previously filled information regarding the Issue, allowing you to fix mistakes or update issue information. You can edit your own issue or another user's issues if you have the correct roles and permissions.
For updating information, it is suggested to change issue Status, % Done (if applicable), and to fill the new Log time section to register the work done on the project.
Log Time
- Spent time: Work done on the issue in hours.
- Activity: Describes what type of work was done for the issue. This is defined by an admin in enumerations
- Comment: Allows for text input to communicate anything.
Notes: Allows for a large input of text regarding the issue. Can tick if private or public. Editable later by yourself or others.
Once completed, press submit.
Updating an issue might be limited by admin defined workflow.