Projects
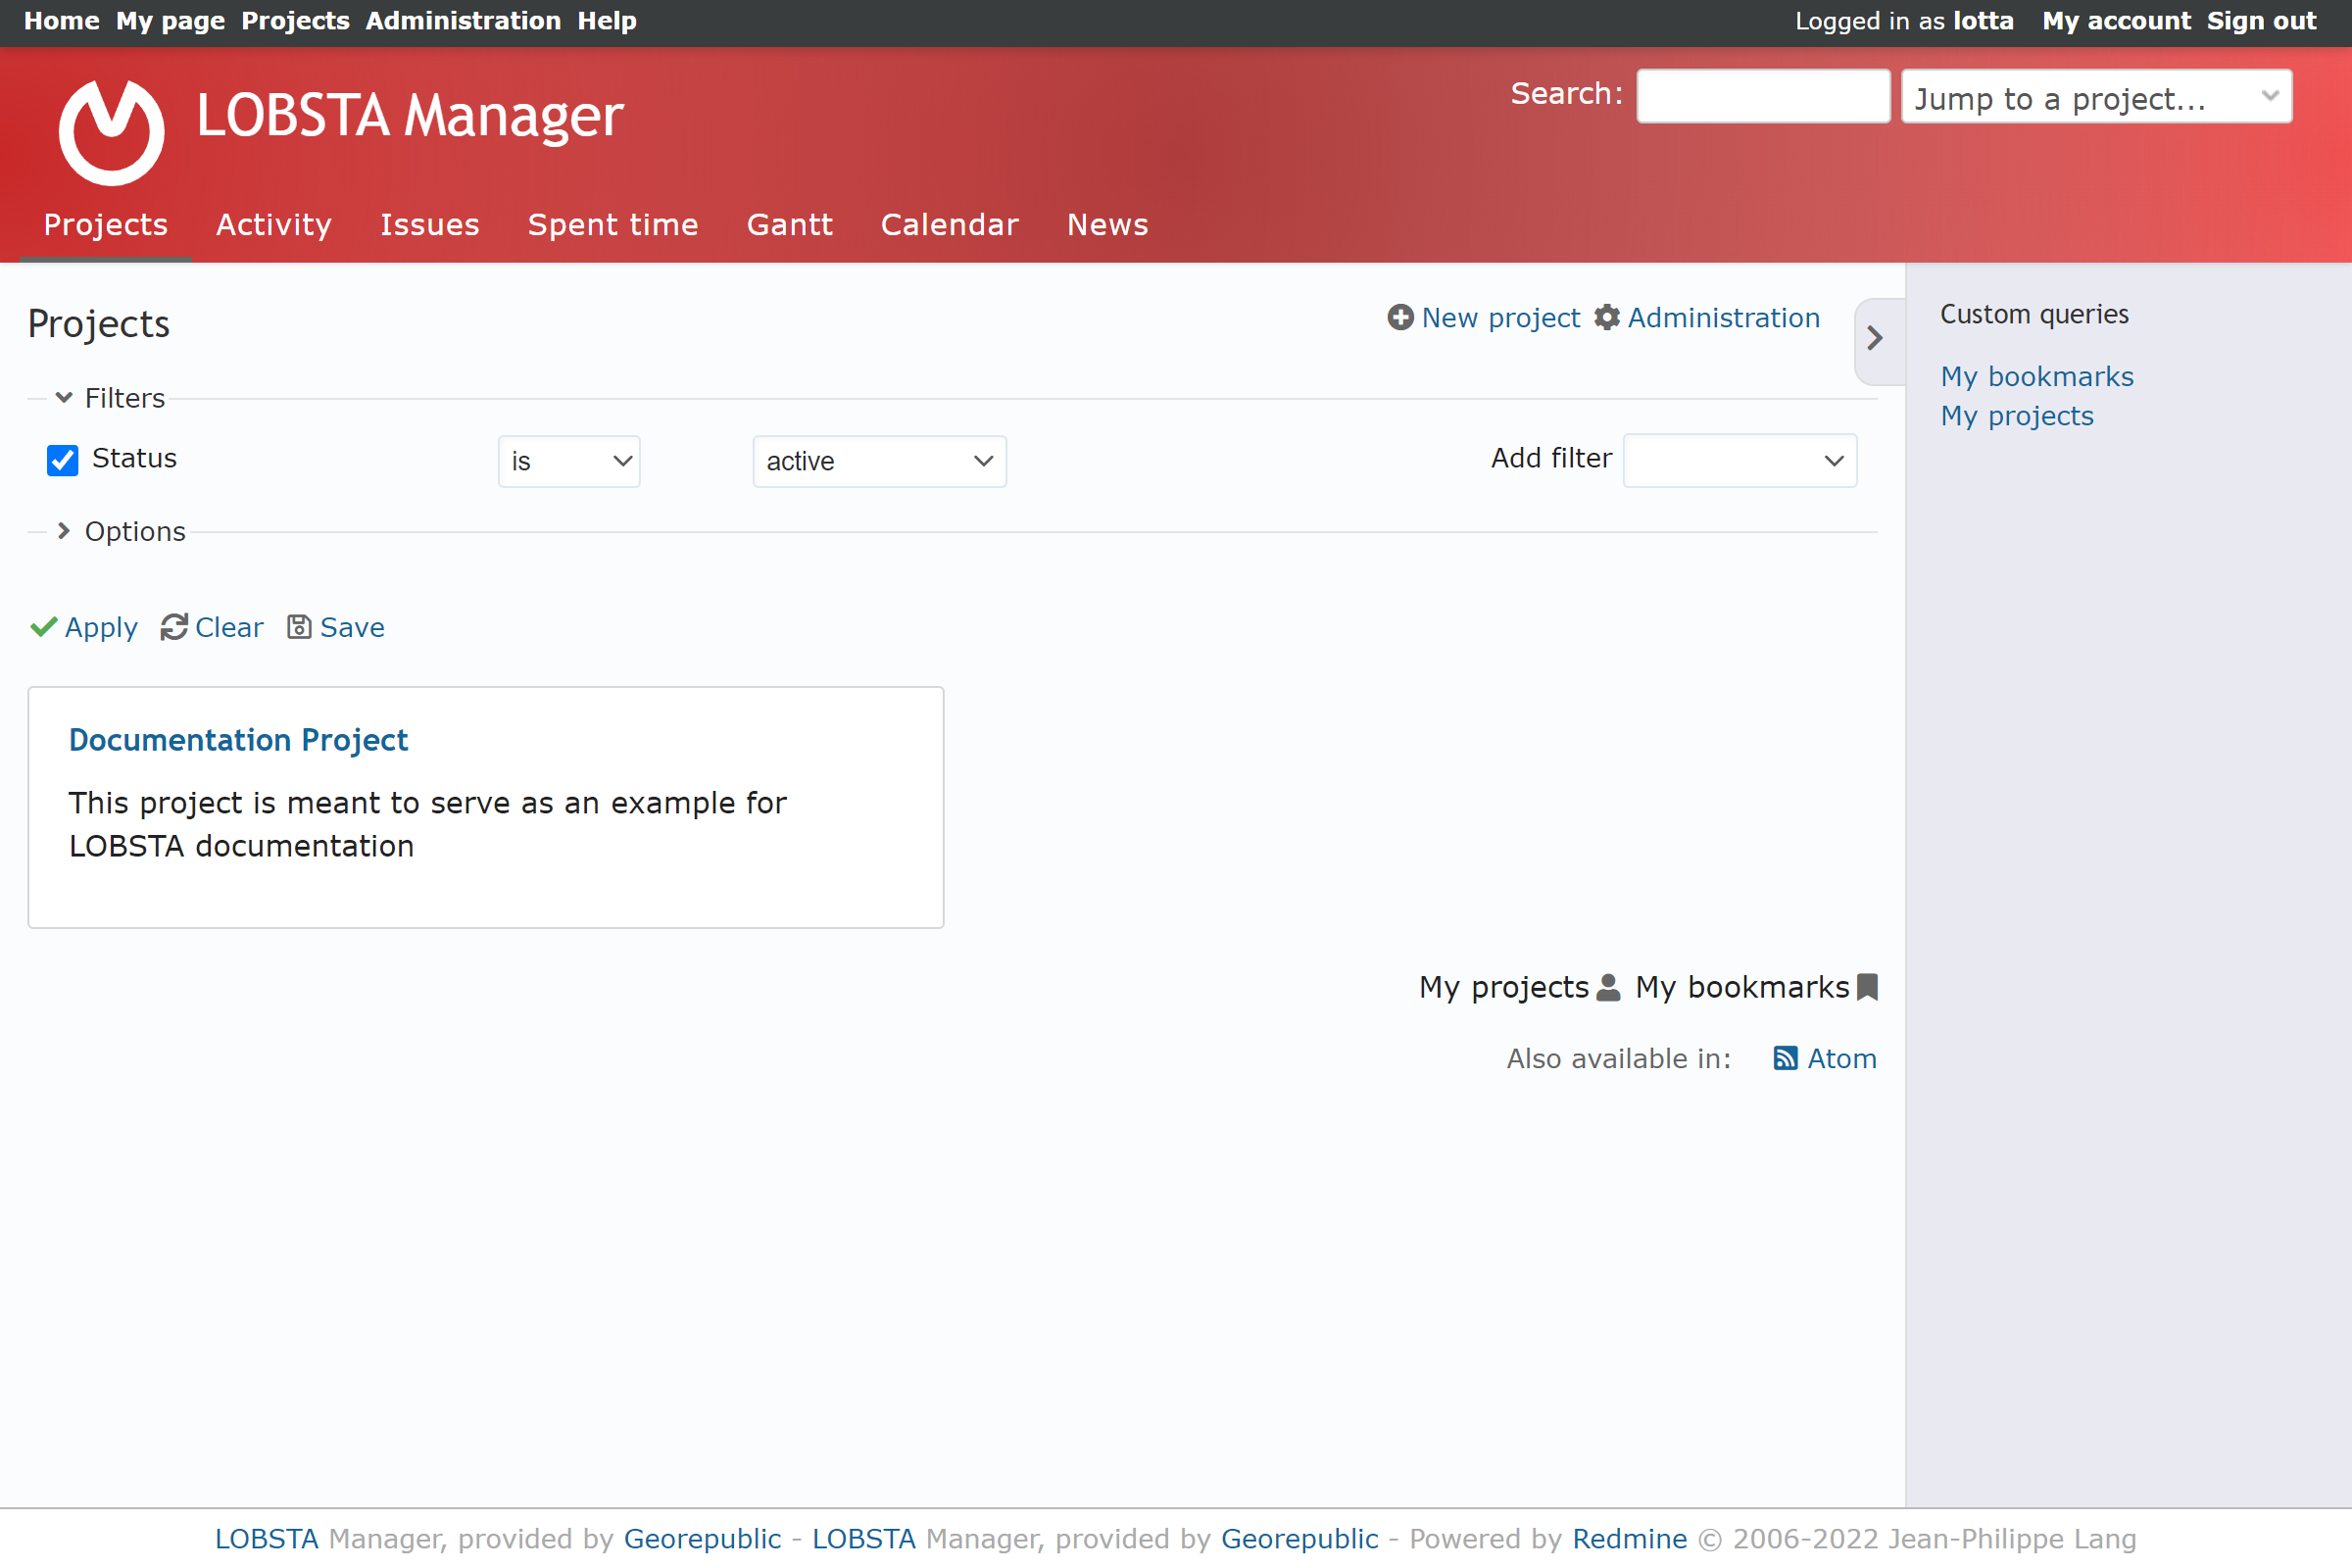
This page displays projects that are tagged as public or assigned to a user by being a member of a project.
Each project item displays the project's name and description, and redirect to that project's overview.

Clicking on the navigation menu will redirect to the selected module, displaying the global versions of the following:
- Activity: Shows the activity of all public projects and projects you are a member of.
- Issues: Shows the issues of public projects and projects you are a member of.
- Spent time: Shows the time logs of all public projects and projects you are a member of.
- Gantt: Shows a Gantt chart, displaying the issues and versions of public projects and projects you are a member of.
- Calendar: Shows a calendar, displaying the issues and versions of public projects and projects you are a member of.
- News: Shows the news of all projects you are a member of or are public.
Clicking on New Project on the right corner will redirect you to the project creation page. If you are an administrator, a button of the same name will appear redirecting you to Managing Projects.
If you feel too many projects are being displayed at a time, you can create Custom Queries to better organize yourself!
Can't see or interact with a project? Certain project functionality might be limited by your LOBSTA administrator.
New Project
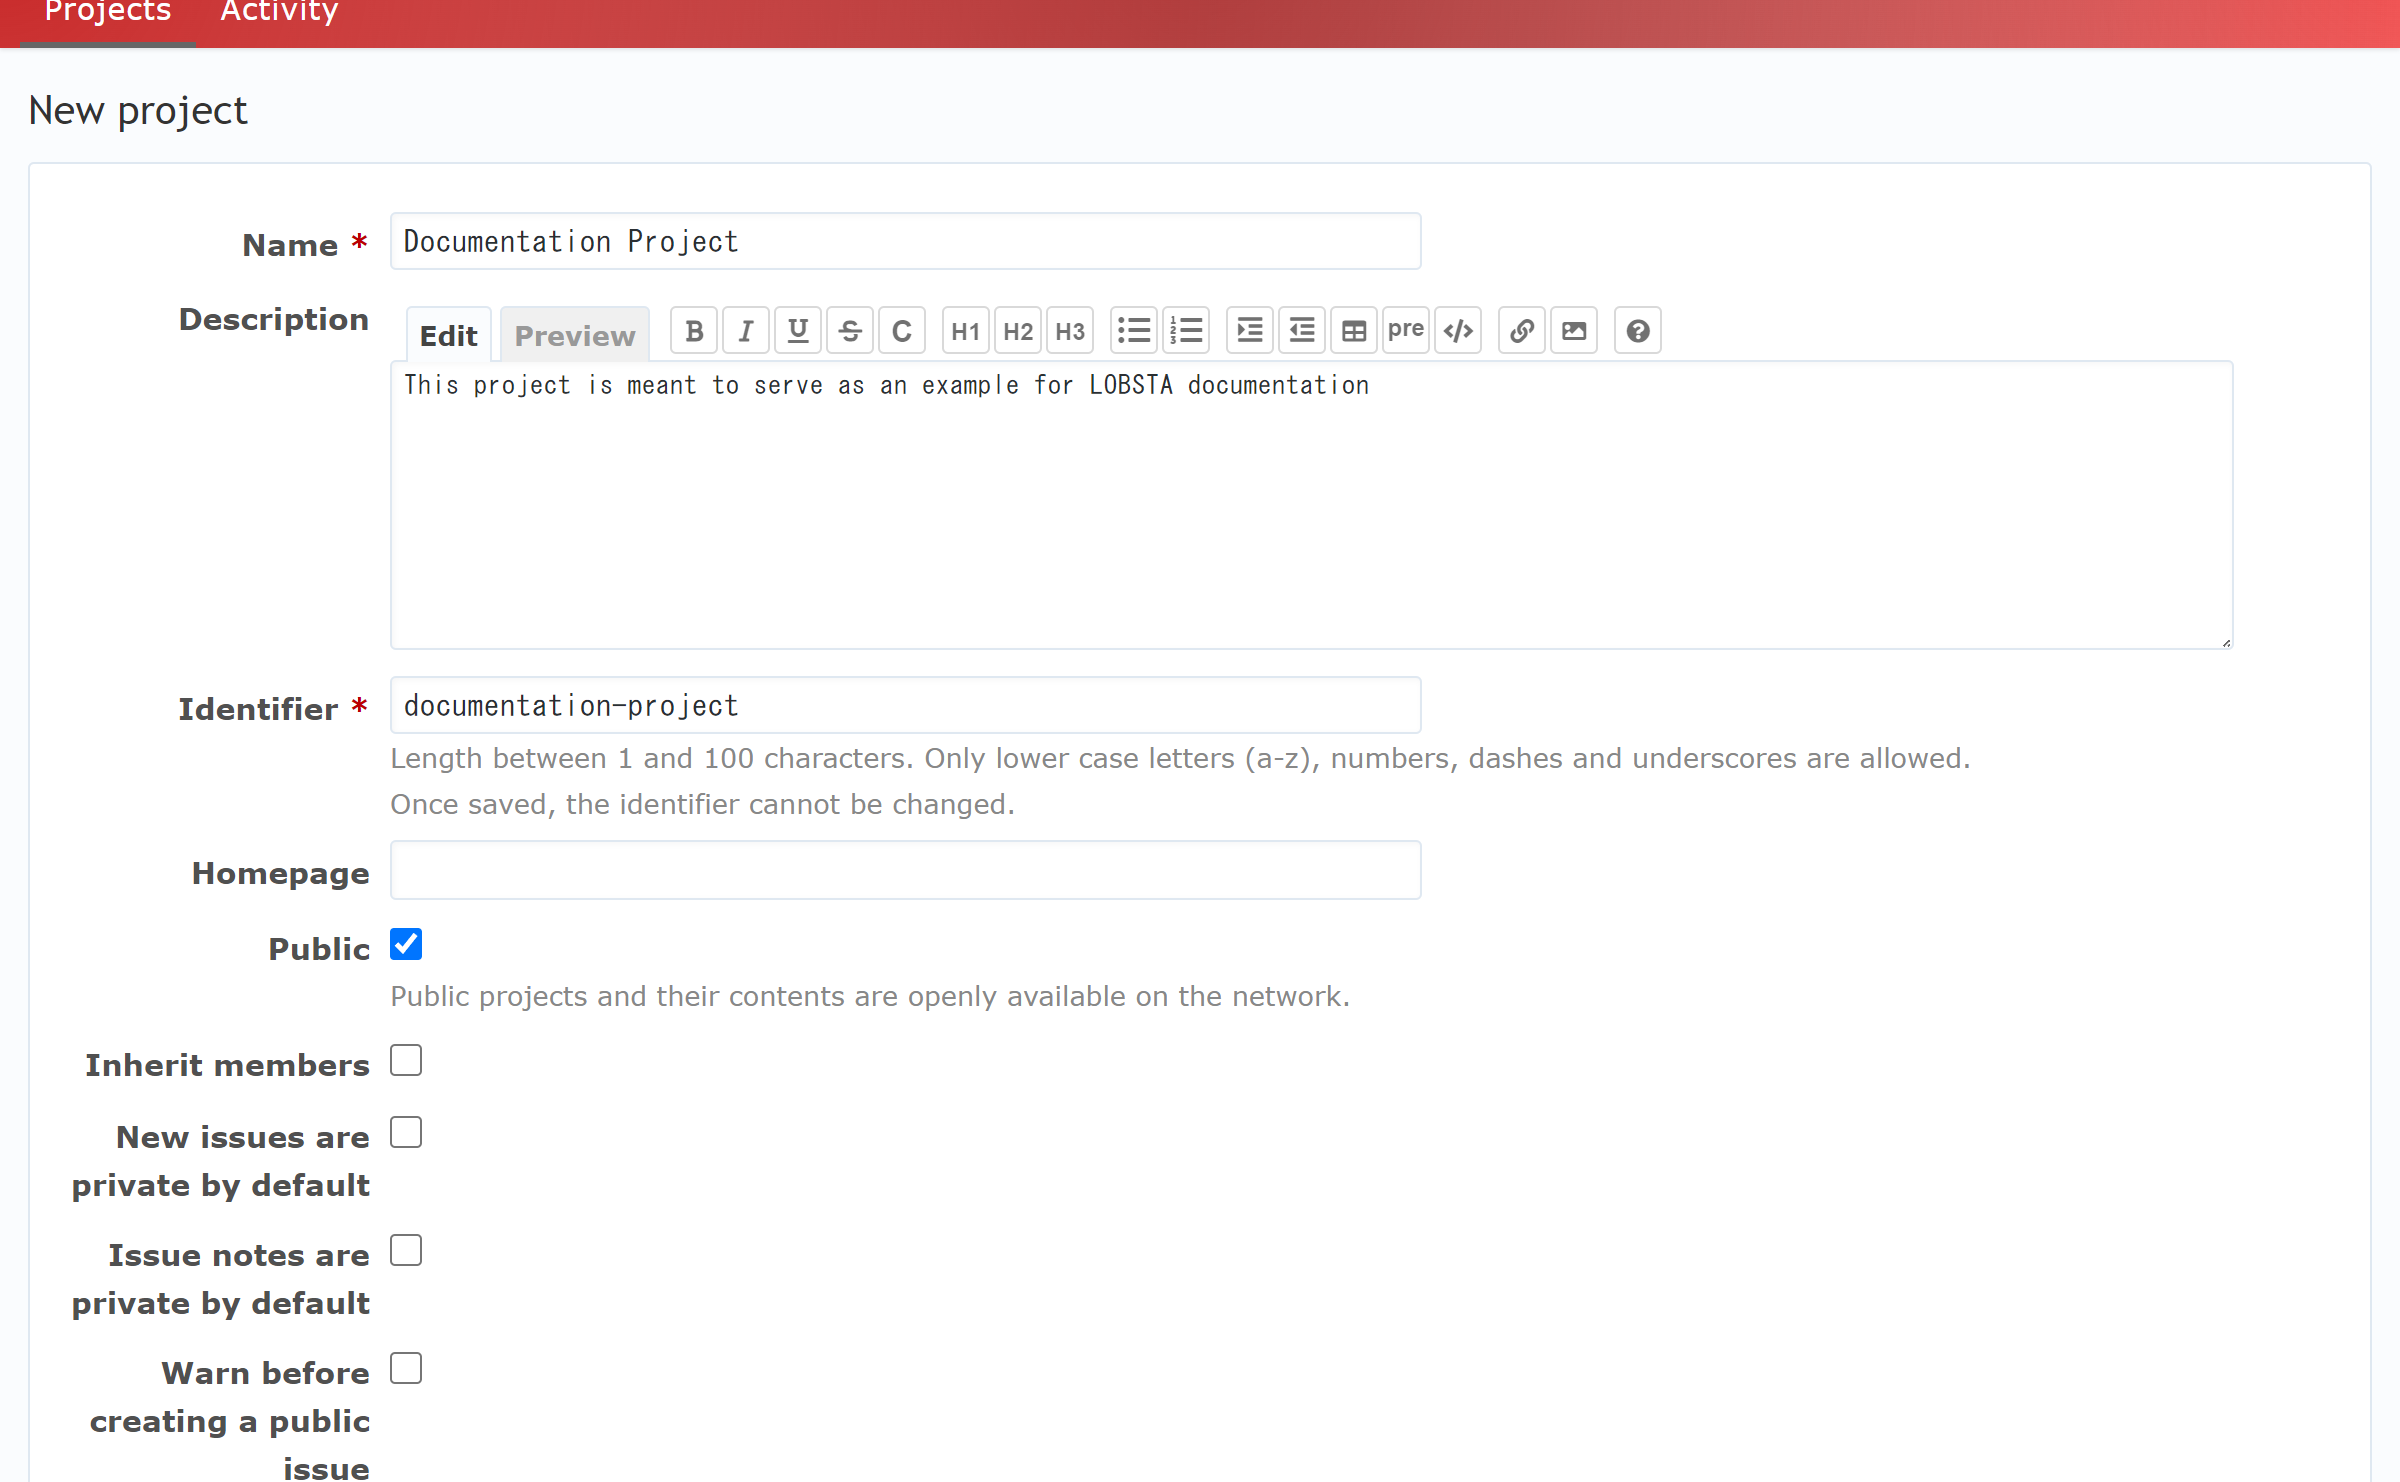
Projects are the core functionality of a task manager.To create a New project you must fill the form as shown further below. A user can only create a project if they have the permission to do so.

- Name : The name of the project.
- Description : General description of the project.
- Identifier : Identifier used by LOBSTA application. It must be unique and alphanumerical, and cannot be only numbers. Once the project is created, the identifier cannot be edited.
- Homepage : Homepage link that appears in Project Overview.
- Public : Category denoting if any user can see the project. If kept private, only members of the project can view and interact with said project.
- Subproject of : Lets you assign a parent project to this project. Nesting is unlimited in LOBSTA.
- Inherit Members : Allows easy copy of members from the parent project.
- New issues are private by default : Indicates if new issues related to the project will be private or public.
- Issue Notes are private by default : Indicates if new issue notes related to the project will be private or public.
- Warn before creating a public issues : Warns the user with a prompt that they are creating a public issue.
- Modules: Lets you choose the modules that will be displayed for the project. Unchecked modules are still in the project, but are inaccessible for the user.
- Default Modules : Modules that appear ticked on by default are set by a LOBSTA admins.
Once you are happy with the initial project settings, click Create or Create and add another to finish the process and redirect to Project Overview or another New Project, respectively.
Made a mistake or want to update a project? You can edit a project later in Project Settings, with the exception of Identifier.
Project Overview
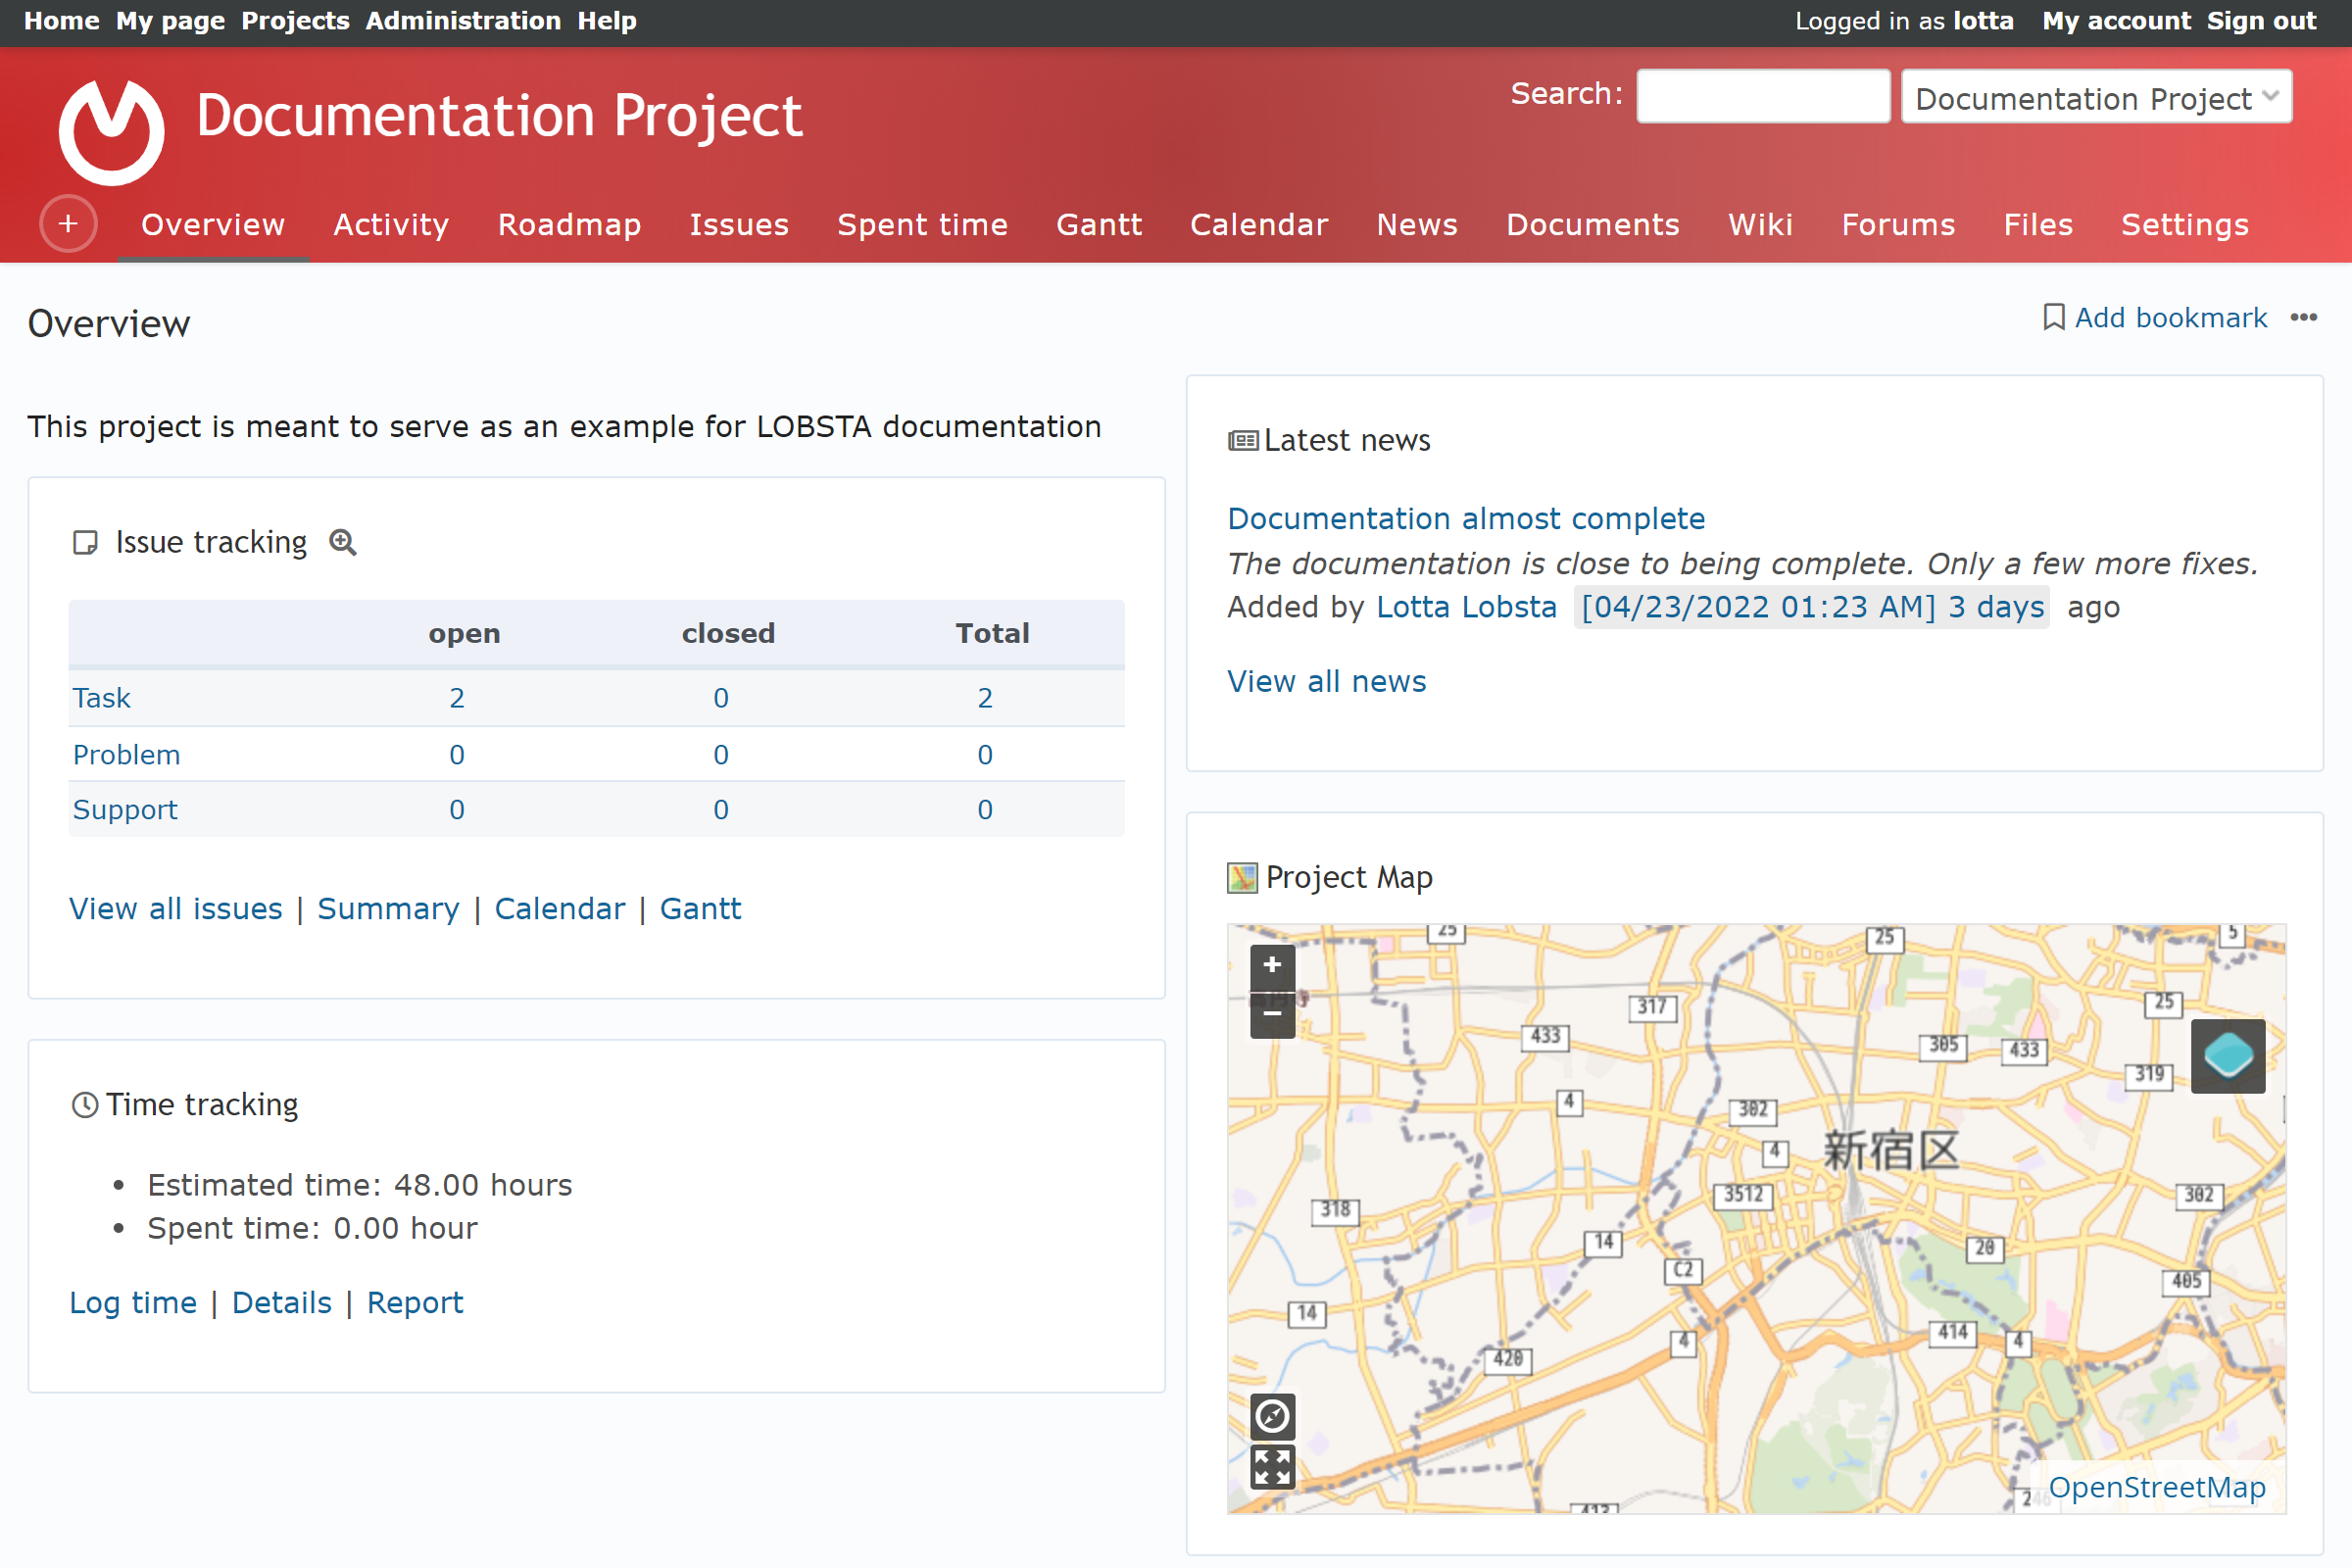
This page will show you the module chosen in the New Project process from the navigation bar and a general overview of the project´s statistics.

By default, a ➕ menu will appear to the left of the navigation bar, allowing for a quick link to the creation pages of the following modules.
➕ Menu
➕ menu might be deactivated by your administrator.
Left hand side
On the left hand side of the screen you will see the description of the project, and:
Issue Tracking
Shows the distribution of issue trackers of the project. This is covered more in detail in Issue List
- View all Issues : Redirects to Issue List, displaying all project issues..
- Summary : Shows a detailed report of project data.
- Calendar: Redirects to Calendar, displaying the projects tasks in calendar form
- Gantt : Redirects to Gantt, allowing to view Gantt chart of the projects issues.
Time Tracking
Shows the estimated time for project completion, as well as the amount of work done in spent time. This is covered more in detail in Spent time.
- Log time: Redirects to Log time, allowing you to log the time of work done for an issue.
- Details: Redirects to Spent time.
- Report: Redirects to Spent time, shows a detailed report of a single filter.
Right hand side
On the right hand side of the screen you will see:
Actions and Bookmark
On the top right hand side you will see Add bookmark, allowing you to mark the project. In the Projects page, you will see the project marked with a ribbon. Additionally, a drop down menu next to the Add bookmark allows for the following actions:
- New Subproject
- Close
- Delete
- Settings
Closing a Project is the equivalent of marking it as completed.
Deleting a project will permanently erase all project´s and subproject´s information and modules. Only an admin can delete a project.
Latest News
On the right hand side, a Latest News section will also appear if any news is made for it, allowing visibility of news of the project according to therr creation date. Clicking on the news headline or View all news will redirect you to news.
Project Map
Below, you will see the Project Map, displaying the project's geolocation information. This map is powered by OpenStreetMap, an admin only configuration.